Anamorphic Lens Setup
This guide assumes Void is already running on the projector and the physical lens is installed.
Common anamorphic lenses
Use the optical factor for your exact lens model. Lens Expansion is Void's aspect-ratio compensation control, including for lenses that compress vertically.
| Lens | Optical action | Lens Expansion |
|---|---|---|
| Panamorph Paladin DCR | 0.80× vertical compression | 1.25 |
| Panamorph Paladin (non-DCR) | 0.75× vertical compression | 1.33 nominally (4/3) |
| Panamorph UH480 | Approximately 1⅓× horizontal expansion | 1.33 nominally |
| Panamorph Phoenix | 1.33× horizontal expansion | 1.33 |
| Spexman Classic / ACE | 1.344× effective magnification | 1.344 required; see precision limit below |
| Prismasonic Cinomorph C-100 / C-150 | Fixed 1.35× horizontal expansion | 1.35 |
| Prismasonic Cinomorph P-100 | Adjustable 1.00–1.35× horizontal expansion | Match the lens's selected optical expansion |
Precision limit: the current slider moves in 0.01 steps and displays two decimal places. Spexman's exact 1.344 cannot be selected through it; 1.34 leaves approximately 0.3% excess width. For a variable lens, keep its optical expansion fixed during setup and playback, or update compensation when it changes.
These are optical references, not a projector compatibility list. The output resolution and physical screen ratio still determine how much of the panel can be used.
This procedure sets up Void's compensation for a physical anamorphic lens and a scope screen, regardless of projector brand. Finish each step before moving on: screen ratio → output → lens factor → physical alignment → distortion → frame alignment → playback.
You will need the screen's visible width and height, your lens model, and its specified expansion or compression factor. Install the lens according to its own manual; mounting, throw distance, and allowable lens shift differ between lenses.
1. Set your screen ratio
Open Screen Configuration → Screen and select the aspect ratio of your physical screen. For a custom size, divide the visible width by the visible height, excluding the frame, and enter the result under Custom → Custom Aspect Ratio. A 300 cm × 125 cm screen is 2.40:1.
This describes your screen, not the current film or projector panel. Ratios of 2.30:1 or wider make the Anamorphic Lens submenu available.
2. Establish the projector's output mode
- Open Display Settings → Change Display Mode.
- Set the output to the resolution that addresses the projector's full panel. For a 4096×2160 panel, use 4096×2160 output; for a 3840×2160 image area, use 3840×2160. The lens factor does not change this choice. Void uses the lens factor and physical screen ratio to calculate the image that fits inside that output.
- On the projector, disable digital anamorphic stretch/squeeze and overscan. Choose an aspect setting that preserves the incoming image's proportions. Check its information screen to confirm it is receiving the resolution you selected.
Void performs the anamorphic compensation. Leave the projector's own anamorphic processing off so the image is compensated only once.
Check: the intended output is active and the projector is not applying a second anamorphic stretch. Keep this output mode fixed for the remaining alignment steps.
3. Enable compensation and set the lens factor
- Open Screen Configuration → Lens → Anamorphic Lens and turn Enabled on.
- Set Lens Expansion to your lens's optical factor from the table above. For horizontal expansion, use the expansion value. For vertical compression, use its reciprocal: 0.80× compression → 1 ÷ 0.80 → 1.25.
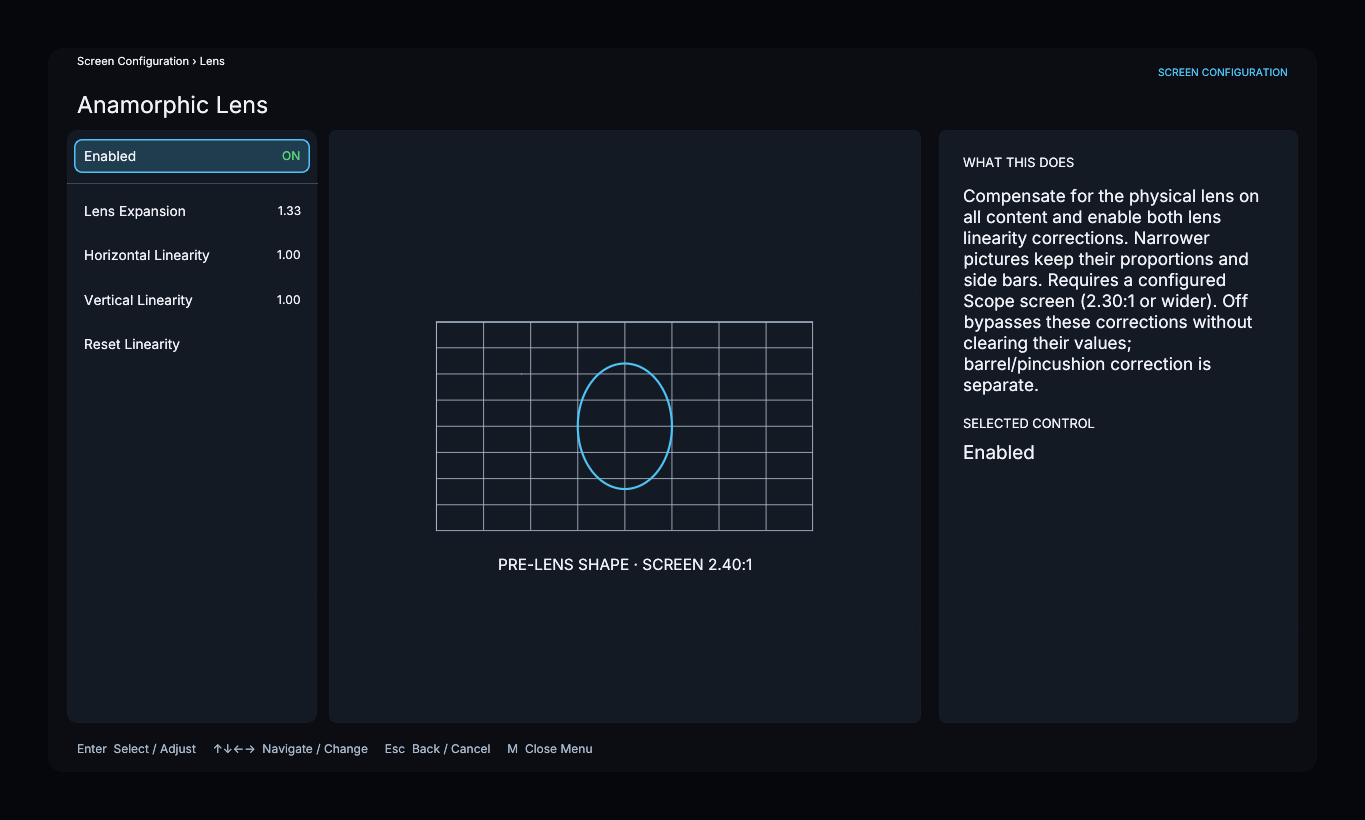
The menu preview illustrates the shape before the physical lens, so its circle can look narrow. Judge proportions using the alignment pattern projected through the lens in the next step.
The lens factor belongs in Lens Expansion. Linearity and distortion correction are separate adjustments for optical errors; they do not set the anamorphic ratio.
Enabling anamorphic compensation sets Automatic Alignment to Center and Vertical Position to 0.00, and locks those controls until compensation is turned off. Automatic Zoom and NLS remain available.
4. Fit Void's pattern using the projector and lens
Enable Screen Configuration → Lens → Show Alignment Pattern. Use Void's pattern viewed on the screen through the lens for the following checks. A projector's internal pattern does not pass through Void's screen fitting or compensation and can have different boundaries.
- Temporarily reduce the projector's optical zoom until you can see the whole pattern border.
- Use the projector's lens shift to center it, within your lens manufacturer's allowed shift range. Check the physical lens mount for rotation, beam clipping, and uneven focus.
- Inspect the center circle. Its horizontal and vertical diameters should match. If it is clearly oval, stop and check the factor and projector scaling before moving frame handles.
- Increase optical zoom until the pattern fits the screen as closely as possible while its border remains visible. Adjust shift to recenter it. Use physical zoom to change overall size; do not use Advanced Width/Height to force an oval circle or mismatched rectangle to fit.
Check: the center circle is round, the image is centered, and the border is close to the visible screen boundary. Bowed edges can remain at this stage; correct those next.
When the full panel does not match the screen
The lens changes the full-panel shape by output width ÷ output height × optical factor. For example:
- 4096×2160 × 1.25 gives approximately 2.37:1.
- 3840×2160 × 1⅓ also gives approximately 2.37:1.
- 4096×2160 × 1⅓ gives approximately 2.53:1.
On a 2.40:1 screen, the last combination needs unused columns at the sides to preserve proportions. It cannot use every panel pixel and show the entire correctly proportioned picture on that screen simultaneously. Void's pattern represents the fitted screen area, so align its border rather than the outer edge of the projector's light spill.
5. Straighten the grid, then finish the frame
Keep Show Alignment Pattern on.
- Open Lens → Distortion Correction. If grid lines are straight, leave it at 0.00. If they bow outward like a barrel, move slightly negative; if they pinch inward, move slightly positive. Watch the whole grid and stop when the lines are straightest.
- Leave both linearity controls at 1.00 unless grid spacing varies across the image after physical alignment. They adjust spacing, not the lens's overall factor. Recheck the center circle after any change.
- Now open Frame Alignment. Move the corners to the screen boundary, then adjust edge handles only where needed. Press Enter to adjust a handle, use the arrows, and press Enter again to finish it. Avoid pulling every handle independently when the whole image only needs optical zoom or shift.
- Select Done, then Save when prompted.
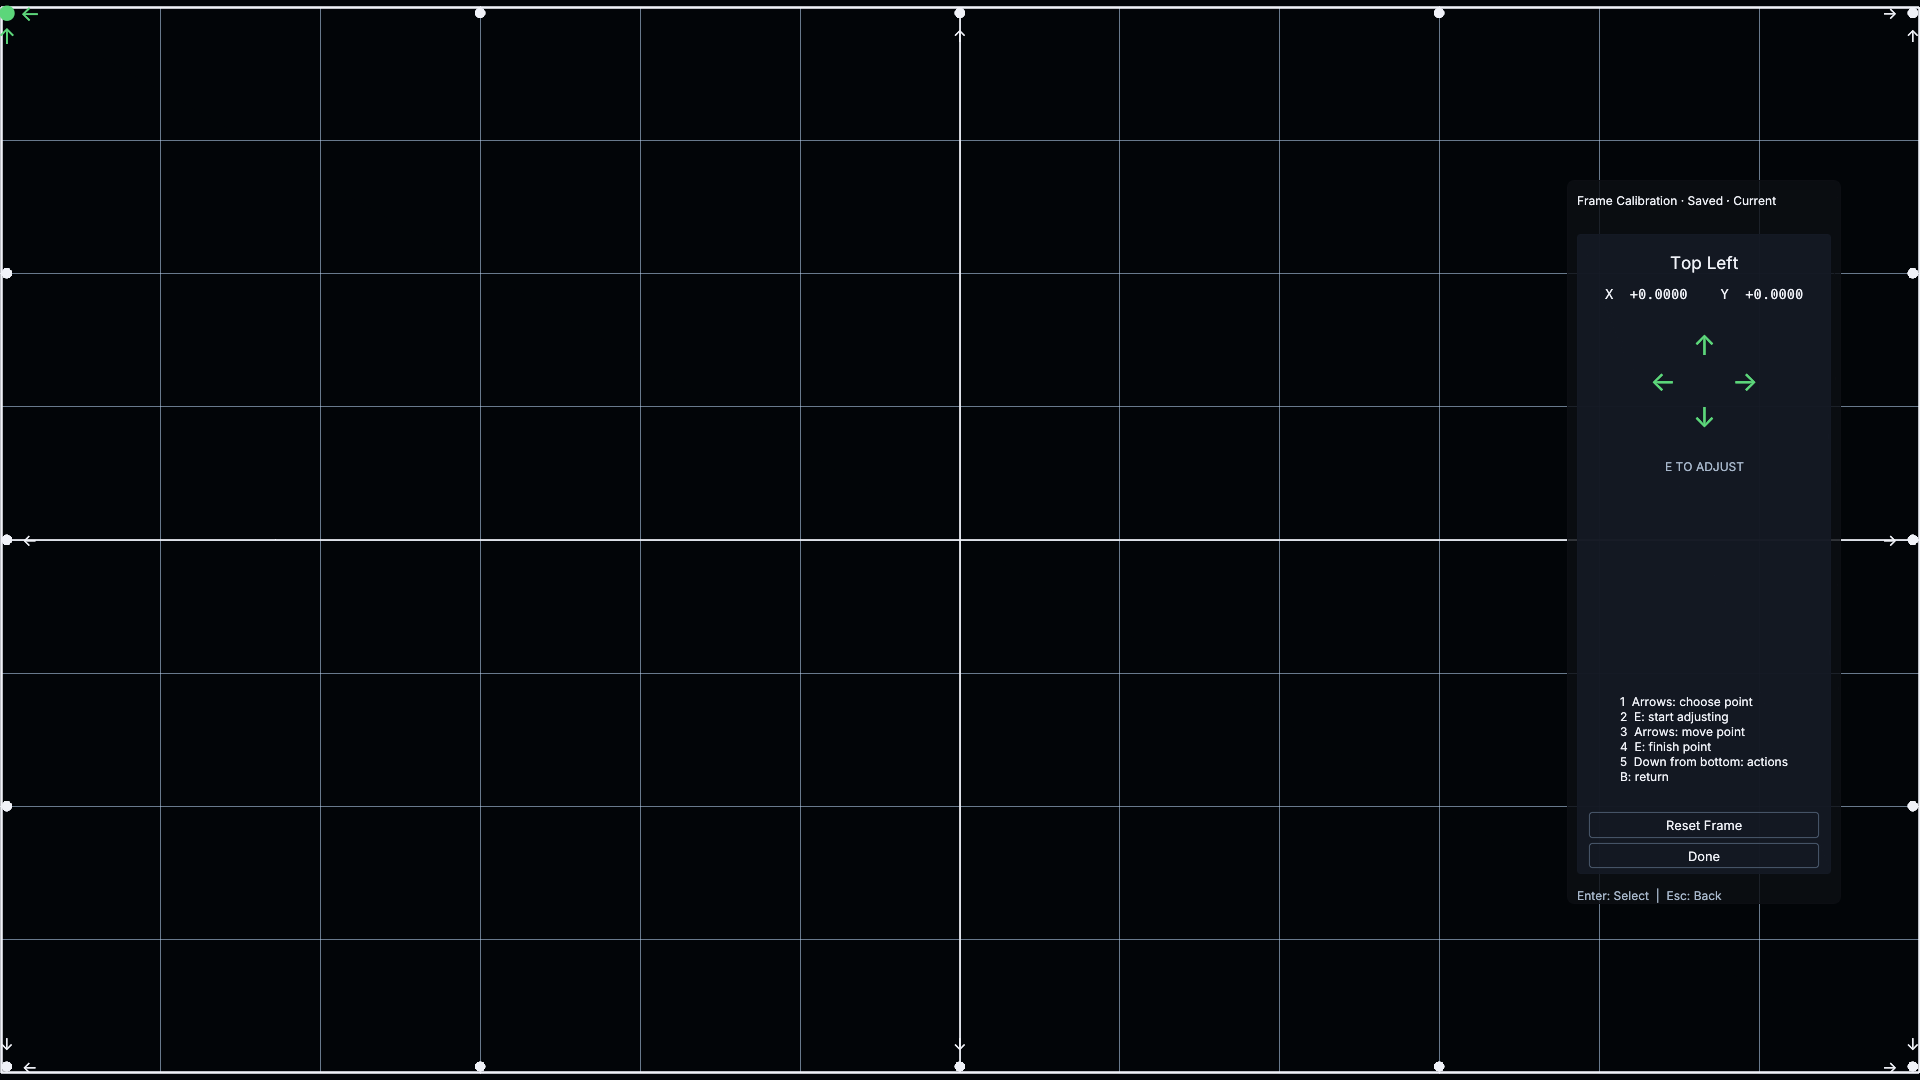
Check: all four boundaries fit, straight lines remain straight, and the circle still looks round. If moving handles introduces curves, use Reset Frame and repeat the final frame step. If you change optical zoom, shift, or distortion afterward, recheck the frame alignment.
6. Verify with two content shapes
Turn Show Alignment Pattern off. Leave Automatic Zoom and NLS off for these checks, and allow content detection to settle after each source change.
- Play scope content matching your screen ratio. It should occupy the aligned screen area. A 2.35 film on a 2.40 screen can retain small side margins.
- Play 16:9 content. It should keep the same screen height with side bars and normal proportions. On a 2.40 screen, a full-height 16:9 picture occupies approximately 74% of the screen width. That is the correct result with a fixed lens in place.
- If the pattern fits but the movie does not, check whether Void has identified the content ratio and whether manual geometry, Automatic Zoom, or NLS was re-enabled. Do not change physical alignment to compensate for a content-specific problem.
Keep the physical lens and Void's compensation enabled for both checks. If you use a lens sled and move the lens out, also turn Anamorphic Lens → Enabled off; Void does not detect the sled position.
Once these checks pass, save the finished screen configuration. You can then enable Automatic Zoom or NLS for your preferred presentation. If using Auto Refresh Rate, whitelist supported modes at the calibrated resolution and verify that playback does not change it.